The admin walkthrough
The builder defines the schema once; the editor fills in content forever
kura's admin is two experiences in one place: the builder defines the schema once, and the editor (your non-technical client) fills in and updates content forever. This page walks both.
For the builder: set up the schema
The project page
Your project lives at /app/{slug}. This is where you find:
- the project slug (used in the API and MCP config),
- the Developer section, where you Create token for your frontend (shown once - copy it on creation),
- your content types and their entries.
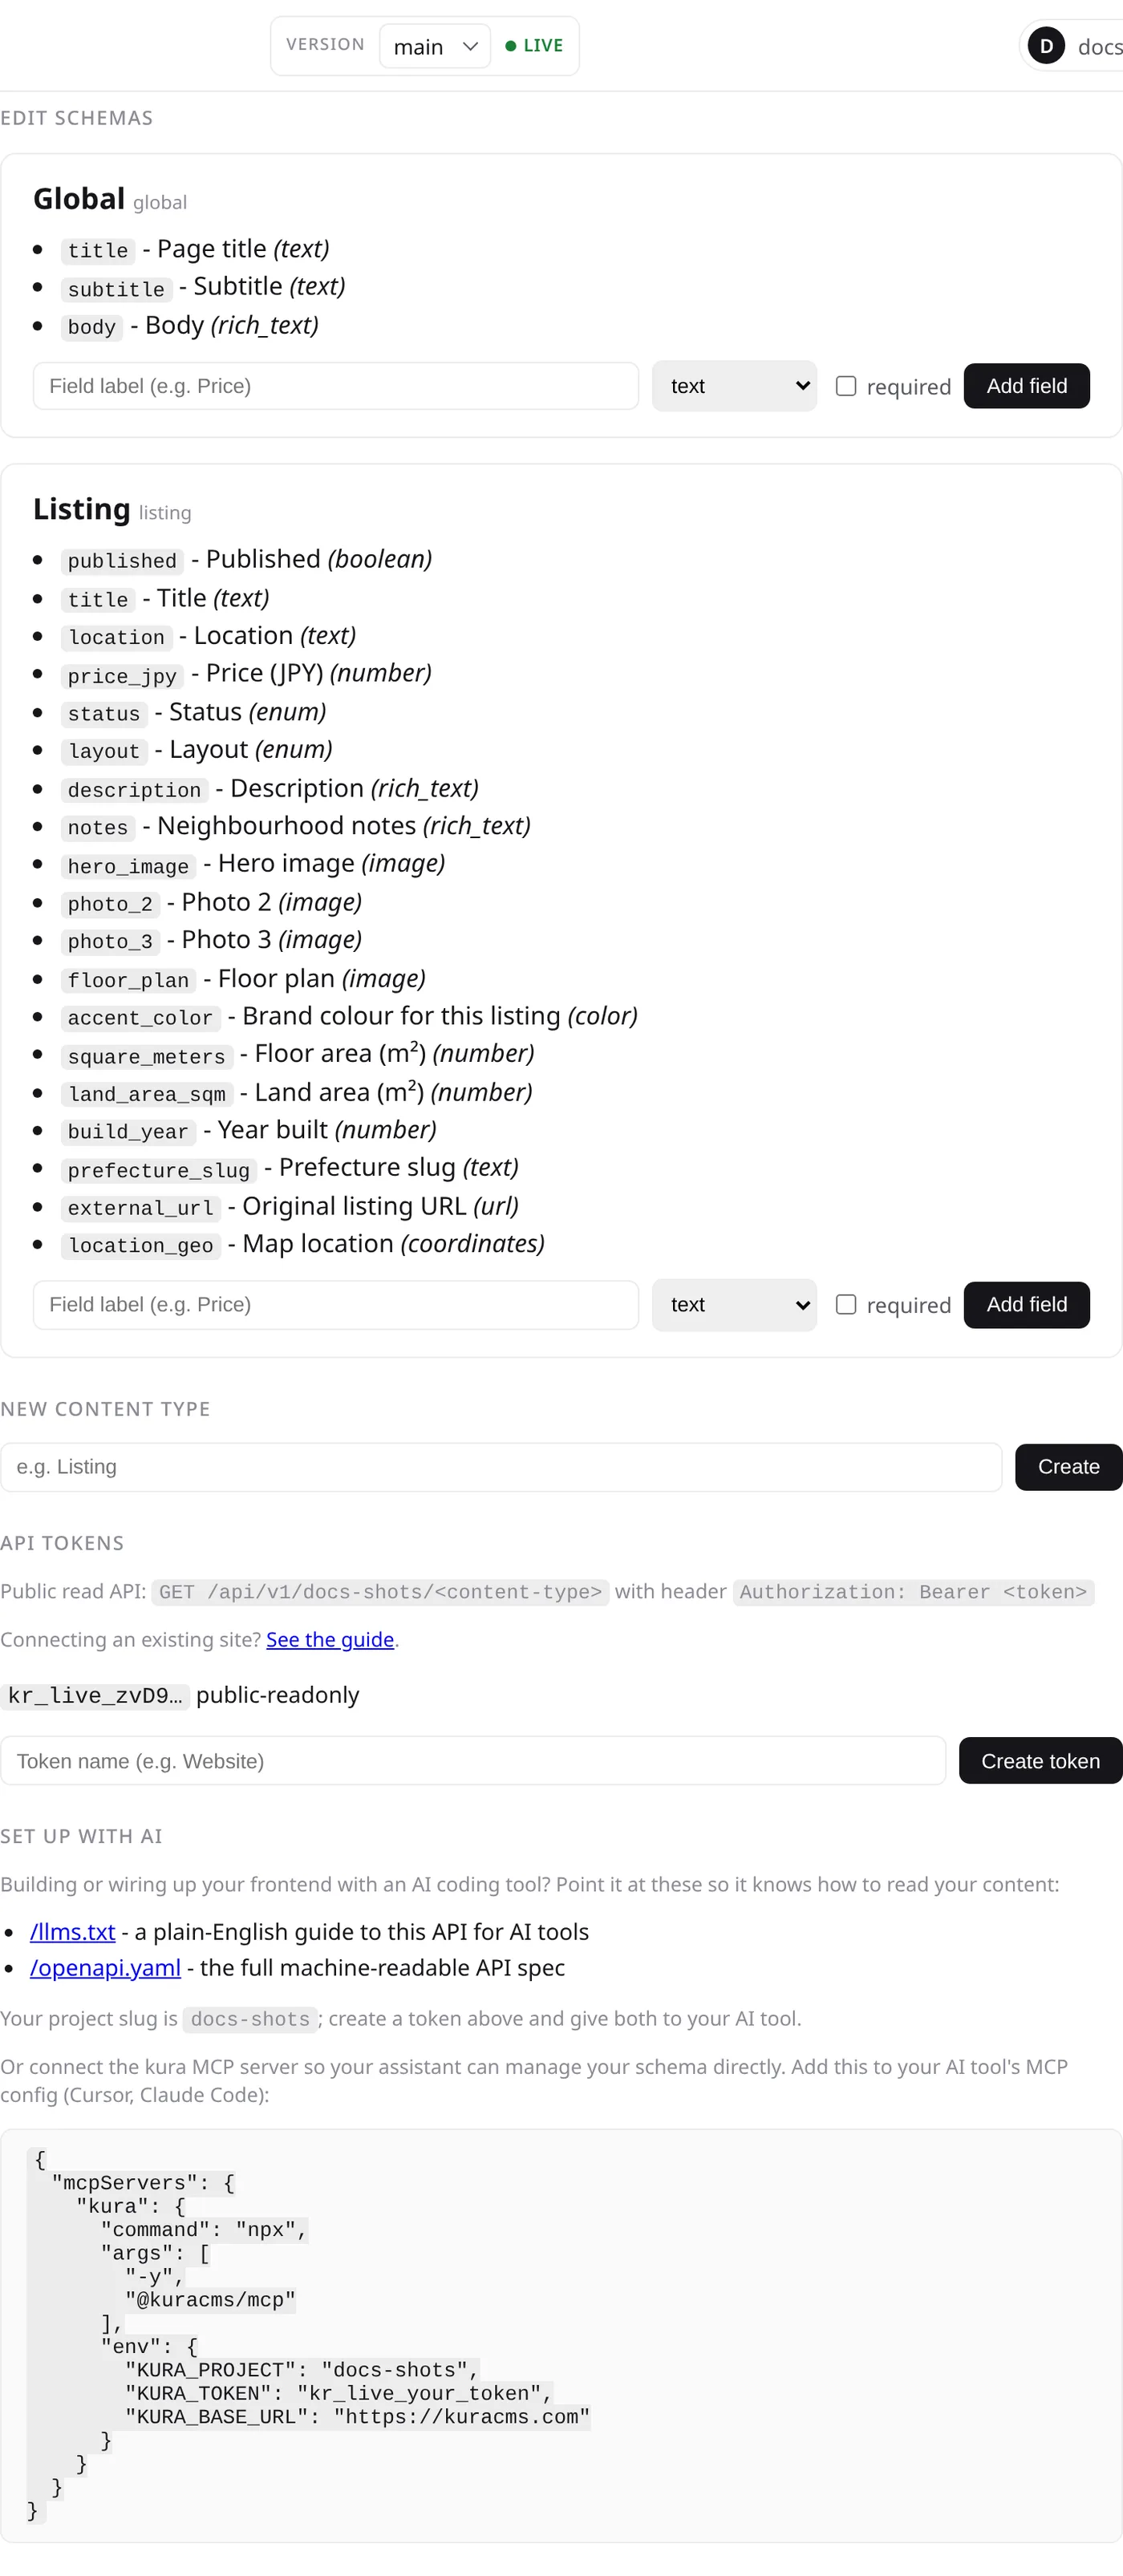
Defining content types and fields
Add a content type (e.g. Listing) and give it fields - each field is one of the 16 field kinds. kura generates
the editor form straight from the fields you define, so there's no form to build by hand.
You can define the schema two ways: here in the admin, or by talking to your AI tool over MCP. Either way the form updates immediately.
Remember the schema is additive in v0.1 - you can add content types and fields
but not rename or delete them. Name fields the way you want them up front; the field key is
derived from the label (Price (EUR) -> price_eur), and that key is
what your frontend reads.

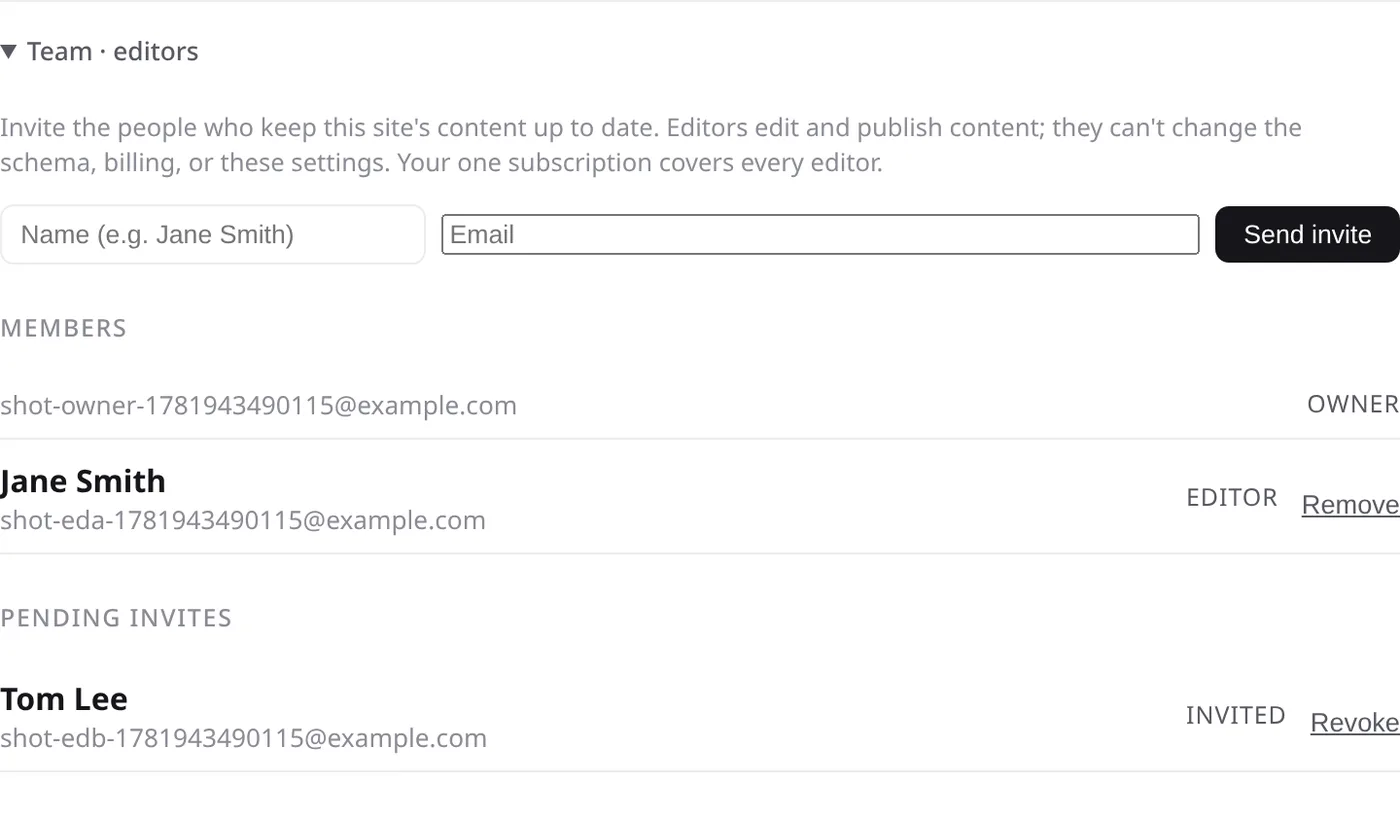
Invite an editor
To hand editing to your client, invite them from the Team section on the
project page (/app/{slug}). It's owner-only: invite by name and email, and
the person gets a magic link. When they accept, they sign in under their own account as an editor.
An editor can edit and publish content - nothing else. They don't see the schema editor, API tokens, billing, or the Team section; those stay with the owner. The project's single subscription covers as many editors as you invite - there is no per-editor charge.
For the editor: the day-to-day
This is the editing experience an invited editor sees - no schemas, tokens, or code, just the content forms.
The entry list and form
Pick a content type and you get a clean list of its entries. Click one to edit, or add a new one. The form shows only the fields the builder defined - a text box for text, a date picker for dates, an image uploader for images, a map for coordinates, and so on. Nothing technical, nothing extra.
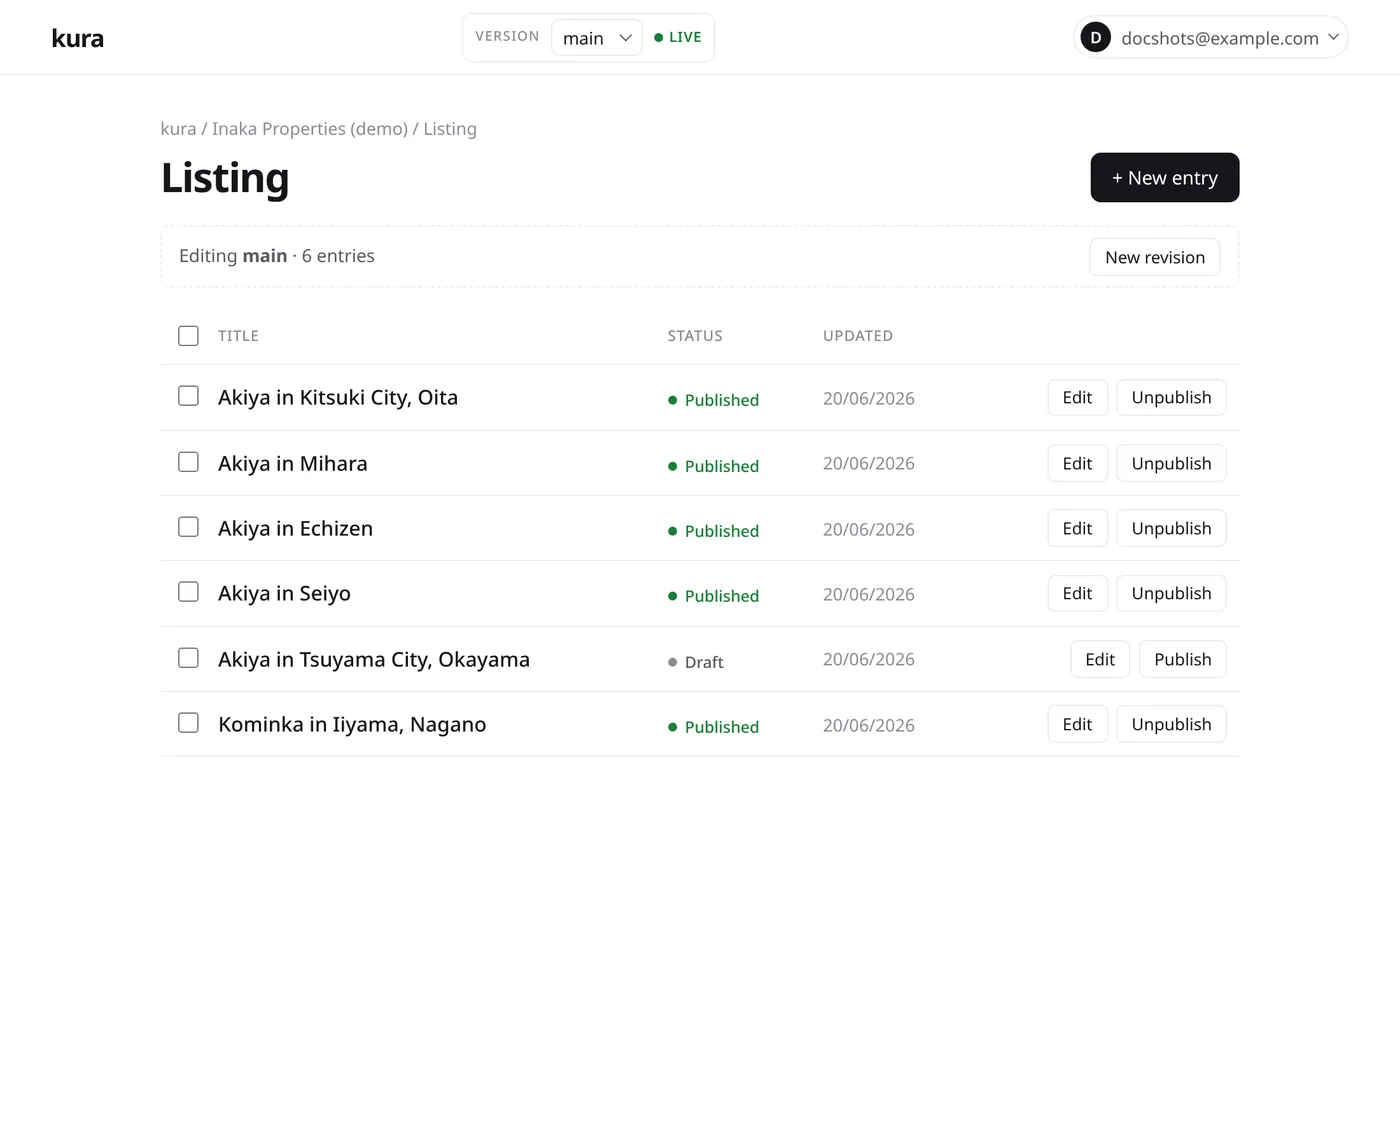

Draft, then publish
Edits are saved as a draft first. Only published content is
served by the public API, so an editor can work on a change and publish it when it's ready.
(Your frontend can read drafts via ?preview for a preview route - see the REST API reference.)

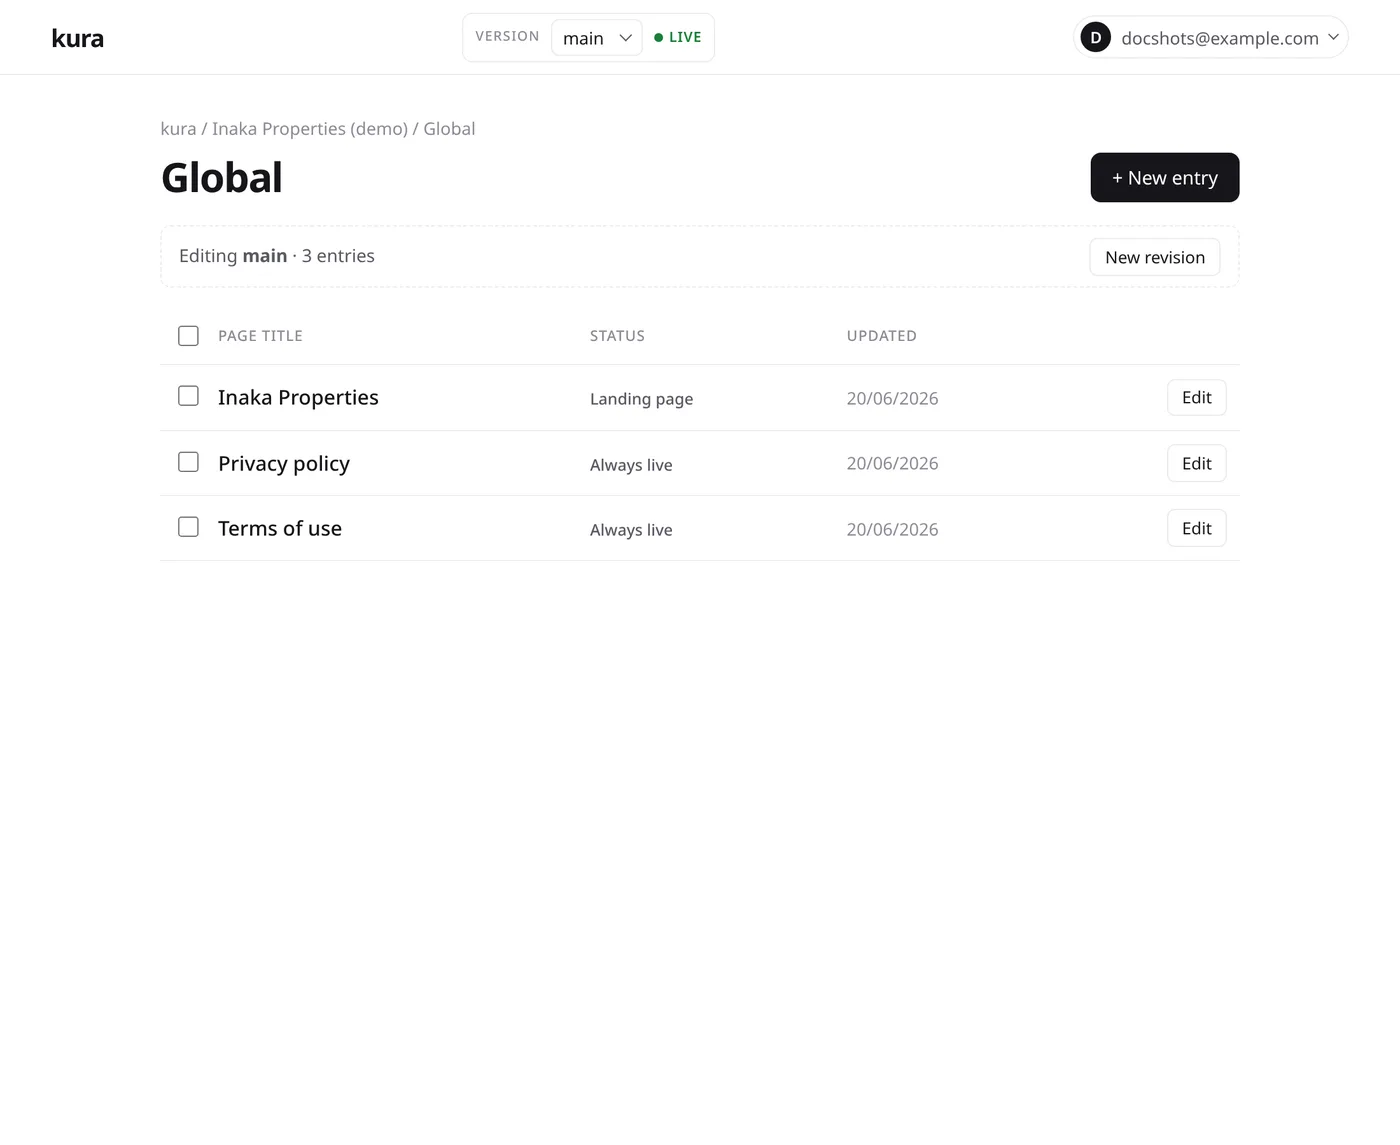
Singletons (global content types)
Some content is one-of-a-kind: the home page, an about page, your privacy or terms text. These are global content types (singletons), and the admin treats them differently:
- there's a single entry, not a list,
- publish controls are hidden - every save is published,
- the global entry with the slug
homeis your site's landing content.
Use these for the fixed pages of a site, and regular (non-global) content types for collections like listings, posts, or products.
Next: see the field-type reference for every field kind, or connect your existing site to read this content from your frontend.